
Exclusive Banggood Coupon Codes
▪ For our readers we have received exclusive discount coupon codes from Banggood, with which you can save up to 25% when buying Mavic, Spark, Mini FPV Racers and accessories such as Runcam Split, FrSky XLITE, antennas, etc. You can find these coupons on our coupons page. This section is constantly updated, so check back often.
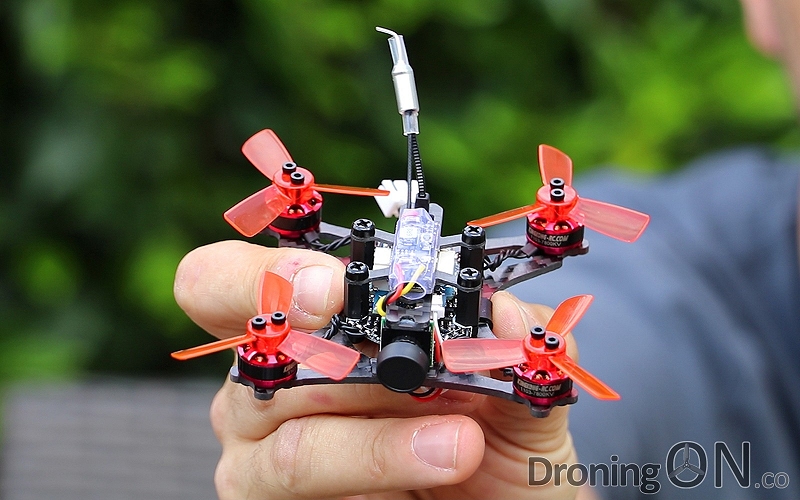
Multicopters are becoming smaller and smaller. Micros and Minis are now the trend: they offer a lot of advantages compared to big copters: they are cheaper to buy, spare parts are more effordable, crashes cause less damage, they are perfect to fly because of their low mass and due to their low weight, they do not fall under too restrictive laws. The KingKong 90GT is the insider tip among the micro racers.
KingKong 90GT Micro Racing Quad
KingKong 90GT Micro FPV Racer
| Highlights |
|---|
| 1103 7800KV Brushless Motors |
| 600 TVL 16 Channel 25mW FPV Camera |
| 3A BLHELI_S ESCs (Multishot / Dshot300 / Dshot600) |
| Screwed 1935 48.26mm 3 Blade Propellers |
| With FrSky, DSM2 or FASST Receiver |
| 2S Powered |
| Weight: ~49g |
| Flight Time: 6-7 mins. |
| Micro F3 6DOF Flight Controller (32-Bit) |
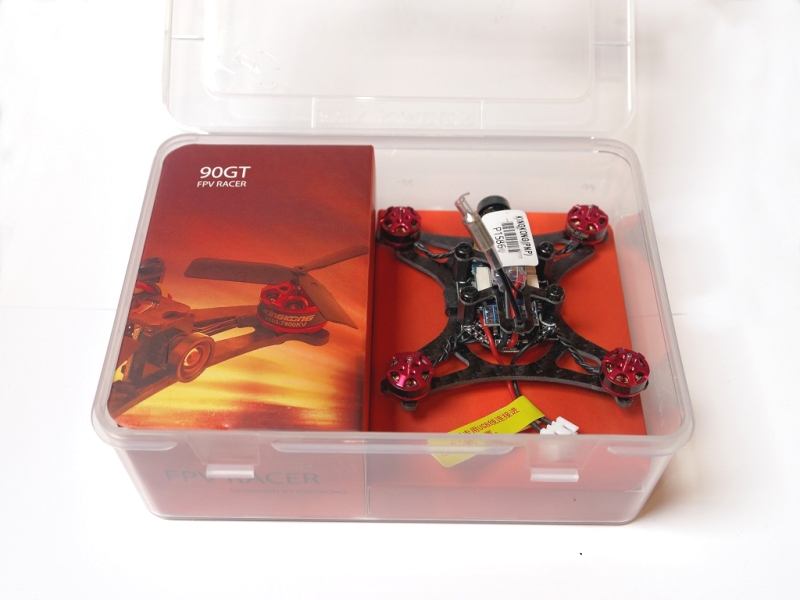
| Comes with a nice transportation box |
| BetaFlight pre-flashed |
| Useful Links |
|---|
| KingKong 90GT at Banggood |
| KingKong 90GT Spare Props |
| Racerstar 1935 5-Blade Props |
| LED Strip |
| 2S 850mAh Lipos at Hobbyking |
| Lipo Tray for Hobbyking 2S Lipos (Thingiverse) |
| 1000TVL Micro FPV Camera |
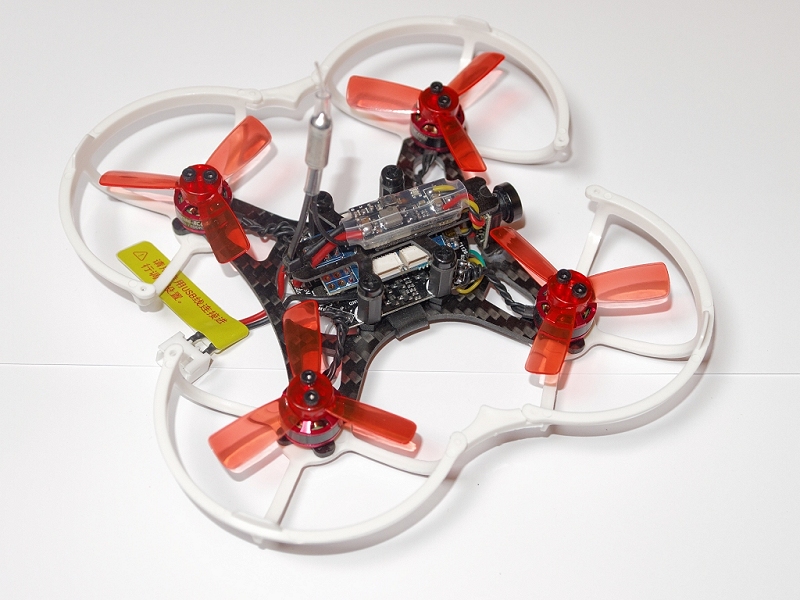
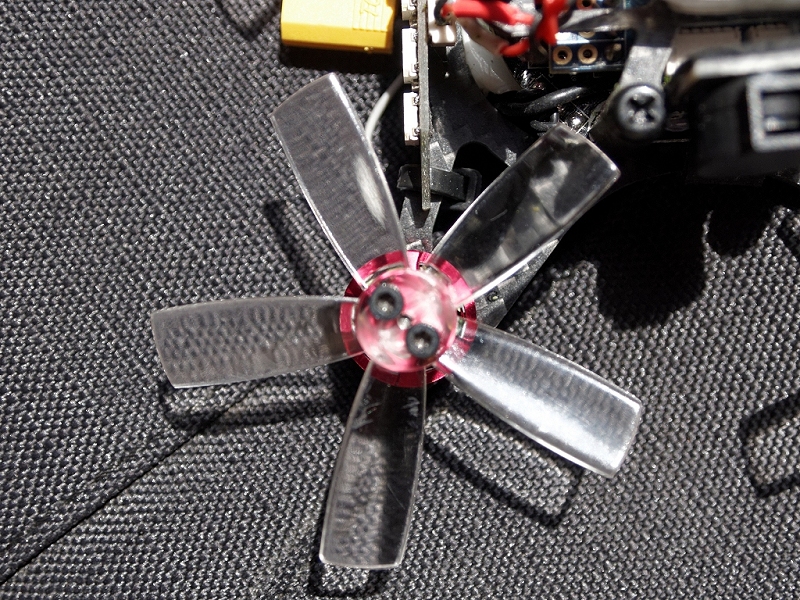
Even while holding the KingKong in your hand, you’ll notice the good and solid materials – a real contrast to the Eachine QX95, which feels more like a cardboard copter: the QX95 frame brakes too easily while the 90GT frame is rather solid. The propellers are screwed and not, as with most Minis, just stuck on the motor pins. So you don’t have to fear any disengaging props on full throttle.
Propellers
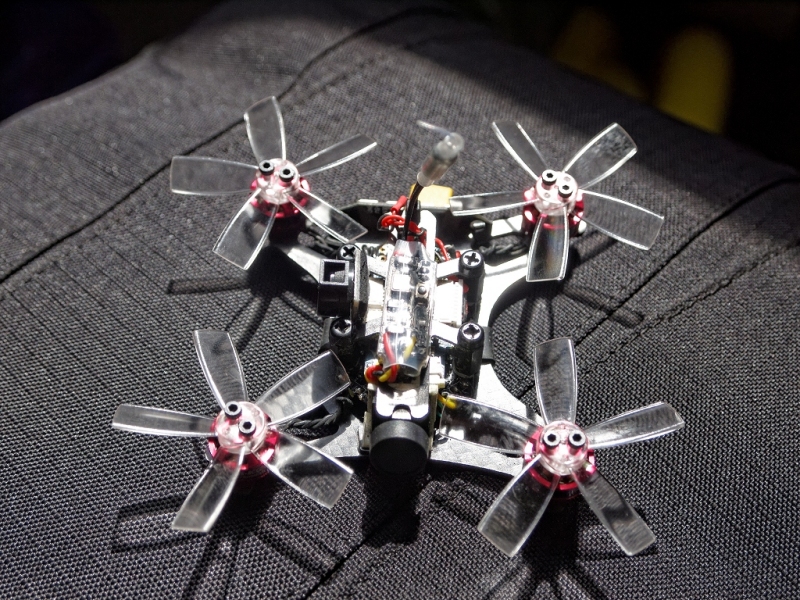
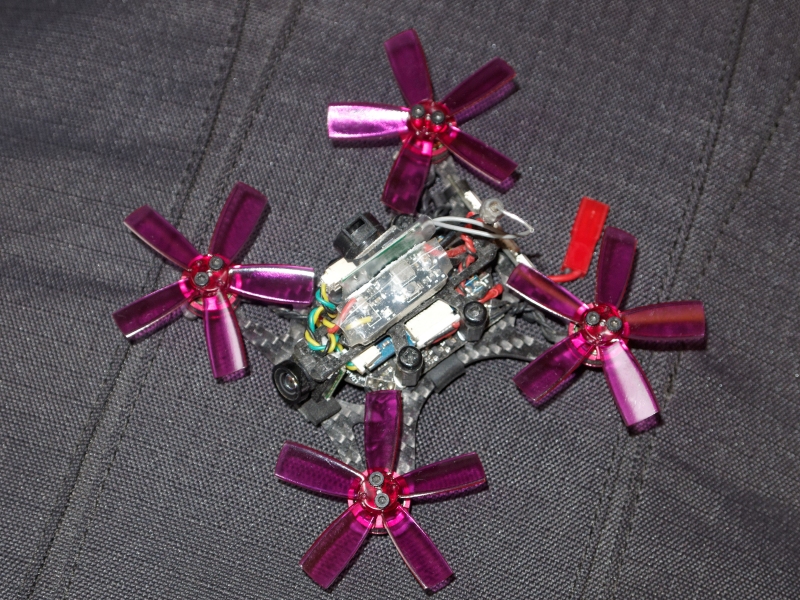
The attached 3-blade propellers are slightly translucent and look really stylish. There are 2 sets (eight pieces) included. The KingKong Props are available in many colors: purple, red, orange, white, blue, etc. They are screwed onto the motor with two screws each and are quite efficient, but they break easily because they are relatively rigid. A good alternative are the 1935 Racerstar 5-blade propellers.
FPV Camera
The 600 TVL camera performs mediocre in sunlight and provides a very useful image. However, as with most cheap FPV cams, light / dark changes and cloudy skies are not handled very well. Actually, the mediocre cam it is the only real con with the KingKong we found so far. The space on the King Kong is quite limited by the propellers so it’s hard to find an alternative mini FPV Cam that fits there. However, a very good replacement for the KingKong Cam is the 1000TVL from Banggood, which performs great for only 10 EUR and is dimensioned only 8x8mm. So it should fit well on the Kong.
The FOV (field-of-view) of the KingKong Cam should be ~120 degrees, which is better than on many other racers.
As with most micro racers, the camera is installed straight forward. If you prefer to fly indoors, you can leave it that way. However, if you like to have fun with Acro mode or high-speed-flying, a steeper camera angle of 30-40 degrees or more is recommended. This can be done here quite easily and without extra camera mount (read more under “Modding”). With a camera angle of 30 degrees or more, the KingKong really starts up and offers a great speed!
The video transmitter offers 16 channels, four channels on each frequency band. Changing the transmitting video channel is quite easy: just press the small button on the video transmitter. A colored LED flashes in different colors, where each color code (f.e. green-blue) represents a certain frequency. There is a color code table included in the KingKong’s manual that refers to the color codes and video channel representations.
Receiver
We ordered the 90GT with DSM2 receiver. This could be bound within seconds and worked without any problems with my Devo 10, when set to Spectrum1024 in BetaFlight. The receiver has two antennas to improve the reception quality. The receiver offers seven channels when connected via DSM2. If you connect the receiver with DSMX (then Spektrum2048 should be used in BetaFlight) you have eight channels, but we had serious hickups and brown-outs during flights with DSMX, so you should prefer DSM2 protocol.
Flying Characteristics
The flying characteristics of the 90GT are excellent – even with the default standard PIDs. We only had to set the D-values ??a little higher, nothing else. The KingKong nearly flies like on rails, although it is very agile. Even in stabilized mode, he is still very fast and agile. Flips and Rolls can be flown perfectly. Thanks to the low weight, the KingKong has a brilliant hang time: if you take the throttle away at high altitude, it almost looks as if it were weightless in the air. Of course, the Kong’s power cannot be compared with the punch (traction) of big 4S racers. Therefore, you’ll have to push the throttle stick earlier in acrobatic maneuvers.
After an update to BetaFlight 3.1.6, we set the KingKong to DShot150 and use the following PIDs – this way it flies absolutely brilliant and can be controlled very fast and accurately:
| P | I | D | RC Rate | Super Rate | RC Expo | |
| Roll | 60 | 40 | 35 | 1.20 | 0.75 | 0.10 |
| Pitch | 70 | 50 | 35 | 1.20 | 0.75 | 0.10 |
| Yaw | 70 | 45 | – | 1.20 | 0.70 | 0.00 |
Before the first flight
All in all, the 90GT is immediately ready for use after binding. However, you should take the time and adjust some settings in BetaFlight. Here, as always, you should pay attention that the stick end points of the control channels are nicely tared (minimum at 1000, middle at 1500, maximum at 2000). A guide is available here.
There is no low voltage alarm or buzzer pre-installed, so you should not fly too far and keep track of your flight times. Use the timer on your TX to be alerted.
As with many FPV quads, it may happen that the camera is not focussed correctly. To correct that, gently turn the lense until it breaks free from the little glue that is used to hold it. Then turn it clockwise or counter-clockwise until you receive the sharpest picture in your video goggles. Use a drop of power glue then to fasten it again.
If you unscrew the propeller protection (screwed to the bottom of the engines), use only two screws (instead of four) per engine and use the long screws (included). Then use the washers (also included) to avoid damage to the motors. If the prop guards are not used, the short screws must be screwed into the motors. Without Prop Guard, do not use the long ones! This would damage the motors!
Conclusion
Goal! After some disappointments with Eachine and others, we finally found a full-fledged, mini racer who does not feel like a cardboard toy. The KingKong 90GT makes a very valuable impression, is fast and brings plenty of fun! The original Props are very fragile, so you should go for the Racerstar Props. The stylish transportation box of the KingKong is a highlight and the included 9-pin connector, which allows the connection of a LED bar comes very handy.
Unfortunately there is no buzzer pre-installed, so one of the first things to do is to install a custom buzzer (model finder), otherwise you’ll lose the Kong on the first day. Installation of a LED strip is also useful to find the quad in higher grass and increase it’s mid-air visibility. The Eachine QX95 LED strip fits perfectly here.
Next page: Pimp my Kong – Better props and how to install an LED strip on the KingKong 90GT!
KingKong 90GT Modding
Some mods are essential for the 90GT. Here are the most important:
Installing a Buzzer
A buzzer (beeper or modelfinder) that can be activated via a switch on the TX is a must. It may seem unimportant, but if you have ever lost a copter in the high grass, you’ll know about it’s value. Unfortunately, there are no buzzer pins on the board of the KingKong 90GT so you have to go a little detour over the motor pads. Instructions for the buzzer installation can be found below. Be sure to order the Matek Lost Model Beeper before.
Installing an LED Strip
Installing an LED strip greatly improves the visibility of the KingKong 90GT. It makes the tiny quad more visible in the air, but also helps to recover it after a crash in the higher grass. The Eachine QX95 LED strip is a perfect match here. Installation instructions can be found below.
Raising the Camera
Screw off the upper frame plate of the 90GT (where the video transmitter is glued on). The camera is glued to the upper edge of this plate. Carefully break it lose. Then take a double-sided adhesive pad (or hot glue) and tilt the camera at about 30-45 degrees. Then simply screw the frame plate back and you’re ready to go.
Alternative Props
The original props are quite efficient, but not very flexible and therefore tend to break easily. A very good alternative are the 1935 5-blade Racerstar Props. They’re much more flexible. However, the original props are available here, in case you should prefer them instead of Racerstars.
DShot
The KingKong 90GT’ ESCs are DShot capable, but you’ll need to install BetaFlight 3.1 or higher first to activate it. When set to DShot, you don’t need to calibrate the ESCs anymore since DShot is a digital protocol, not an analogue.
Rapid battery change
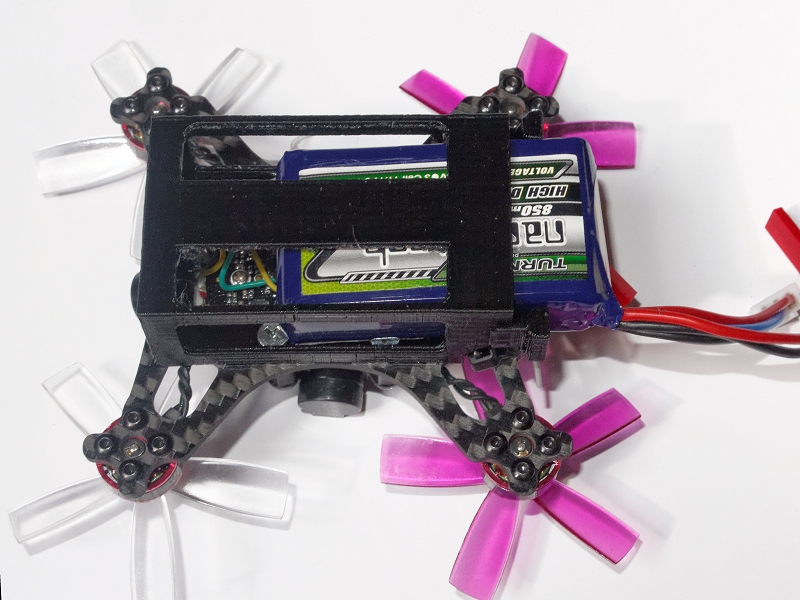
Because I was fed up with the lipo change fiddling, I designed a simple but effective lipo tray / mount for the KingKong which perfectly holds the Hobbyking 2S 850mAh (or smaller) batteries. Download the lipo tray
at Thingiverse.
Installing a Buzzer
If you don’t want to lose your KingKong 90GT in the grass, there is no way around a buzzer. Get the Matek Lost Model Beeper that can also be activated via a switch on your TX. Since the board of the KingKong does not have any buzzer pins, you must go a small detour – which however works just as well:
Soldering the Buzzer
Find the three pins of motor 6 on the board. These are found on the left rear side when the KingKong is facing forward (see picture):
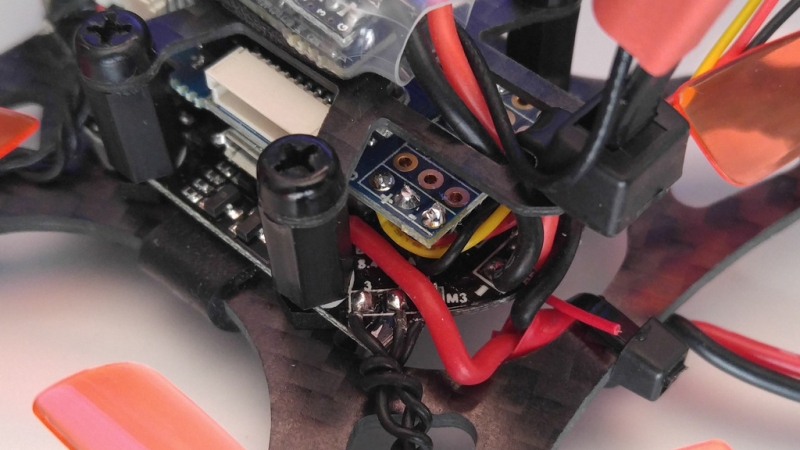
Motor 6 pins (top pin: signal, middle: 5V, bottom pin: GND)
The Matek Buzzer goes to these three pins. The B connector of the buzzer is connected to the motor signal pin, 5V to 5V and G to GND. Mount the buzzer with wires of approximately 5-7cm length, then you can lead those wires below the board and stick the buzzer on the right side of the quad (the left side is occupied by the USB port). Do not forget to isolate the back side of the buzzer with hot glue or an adhesive pad to avoid unwanted short circuits:
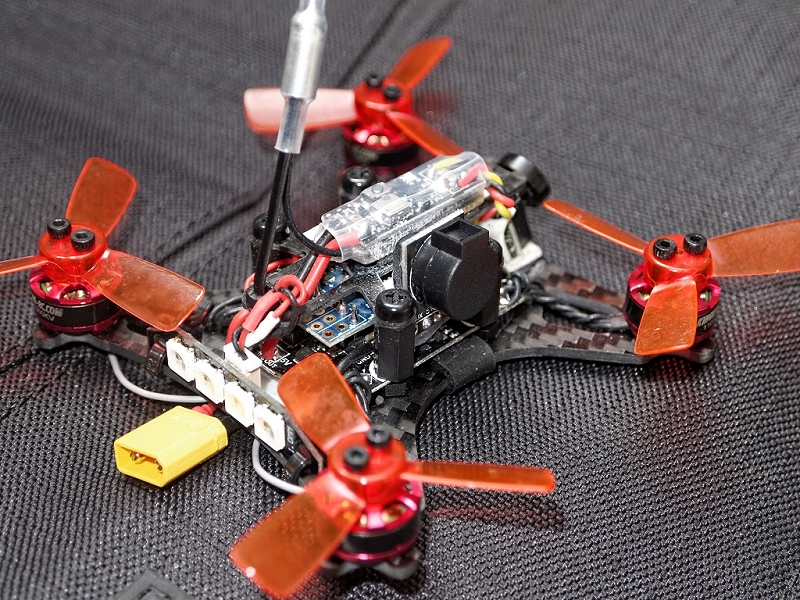
Buzzer attached laterally
Configuring the Buzzer
Once the buzzer is connected to the board, we have to configure it first in BetaFlight. Flash to a newer BetaFlight version (3.1.6 for example) before to get sure that beeper commands (as well as DShot) are supported. So it’s worth updating!
Go to the CLI page in BetaFlight and type “resource”. In the output window there should be an entry with “MOTOR 6” and “B09”, as well as an entry with “BEEPER” and “C15”. The motor 6 resource is what we now throw out and put the Beeper on “B09” instead:
Type “resource motor 6 none” (Enter)
Type “beeper motor 6 none” (Enter)
Type “save” (Enter)
Now both resources are freed. After the automatic reboot, head back to the CLI page. Now let’s put the beeper to B09:
Type “resource beeper b09” (Enter)
Type “save” (Enter)
Now we have to tell BetaFlight WHEN the buzzer should start beeping. First we clear all pre-existing alarm conditions:
Type “beeper -all” (Enter)
Type “save” (Enter)
Now we specifiy our buzzer conditions – copy the follwing into the text box and hit Enter:
beeper GYRO_CALIBRATED
beeper RX_LOST
beeper DISARMING
beeper ARMING
beeper RX_SET
beeper READY_BEEP
beeper MULTI_BEEPS
beeper SYSTEM_INIT
beeper ON_USB
save
The buzzer now alarms when the signal of the TX is lost, on arming / disarming, when the quad is powered on etc. If you want to activate the low voltage alarm as well, enter the following commands:
Type “beeper BAT_CRIT_LOW” (Enter)
Type “save” (Enter)
Now go to the “Modes” page to specify a TX switch for the beeper. Active the “Beeper” mode there and assign an AUX channel that correspondends to a switch on your TX. Done!
The buzzer only works while the quad is battery powered, so you’ll have to plug in a Lipo to test ist. If you find the buzzer ALWAYS beeping, enter the following commands:
Type “set beeper_inversion = OFF” (Enter)
Type “save” (Enter)
Have fun with your buzzer – you’ll be amazed how noisy the little quad can be!
Next page: Installing the LED strip.
KingKong 90GT – LED Strip Installation
The Eachine QX95 LED strip fits perfectly on the KingKong 90GT. So get one before.
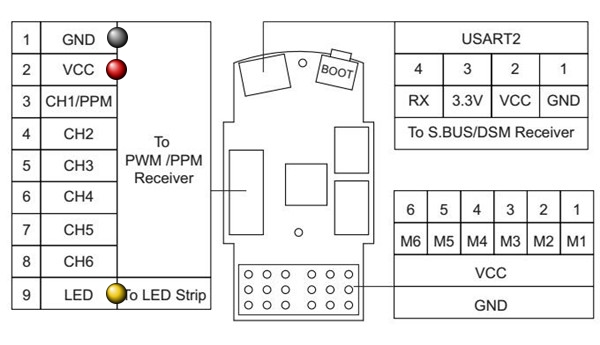
The LED strip is connected to the 9-pin port (the white interface on the left side of the board). Ideally, there’s already a plug included with the KingKong package that fits into this port. Since we need three wires only (power, GND and signal), we can remove all the other wires from that plug.
The topmost wire on the plug is the GND wire. Solder it to the GND wire of the LED strip. The second wire on the top of the plug is the power wire, it goes to the power wire of the strip. The wire on the very bottom of the plug is the signal wire. Connect this one to the signal wire of the strip:
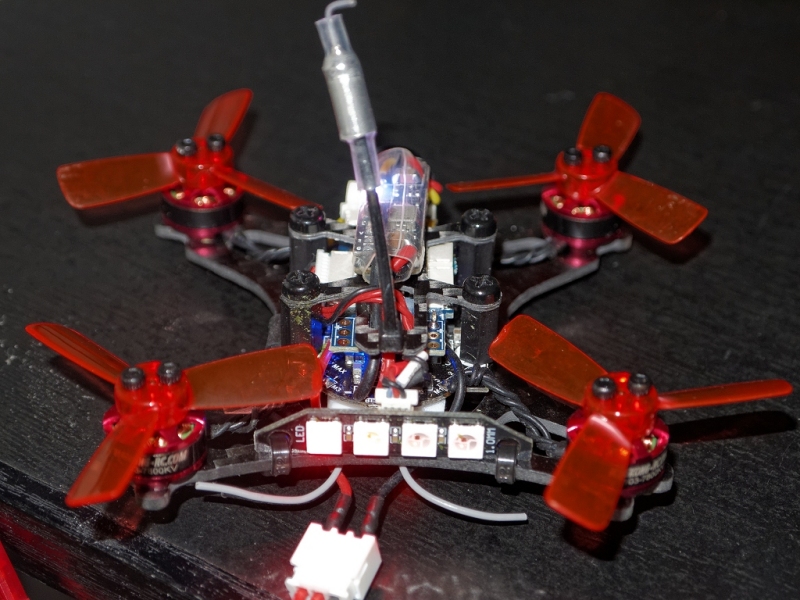
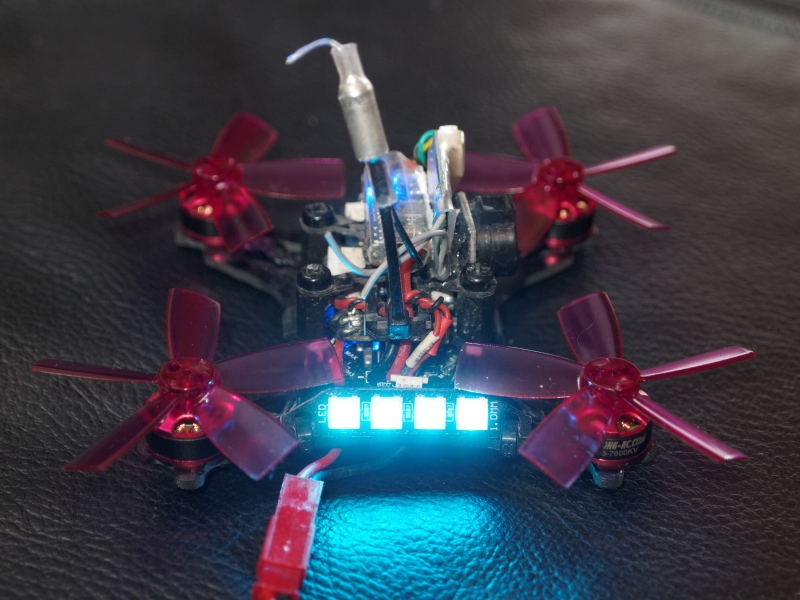
The LED strip itself can be easily attached on the back of the KingKong, using two thin cable ties. There is no need to glue it permanently. Watch out for the wires and make sure that they’ll never touch the props, even on a crash or hard landing:
LED Strip Configuration
Connect the Kong to the PC and open BetaFlight. Go to the “Cogwheel” page and enable the “LED_STRIP” feature. Then hit SAVE.
You’ll find a new page symbol on the left side then – a small LED icon. Click it to go to the LED configuration page.
Now click the “Wire Ordering Mode” button. Then click on four successive boxes in the grid. This adds four new LEDs, numbered from 0 to 3. When done, click the “Wire Ordering Mode” button again to leave that mode.
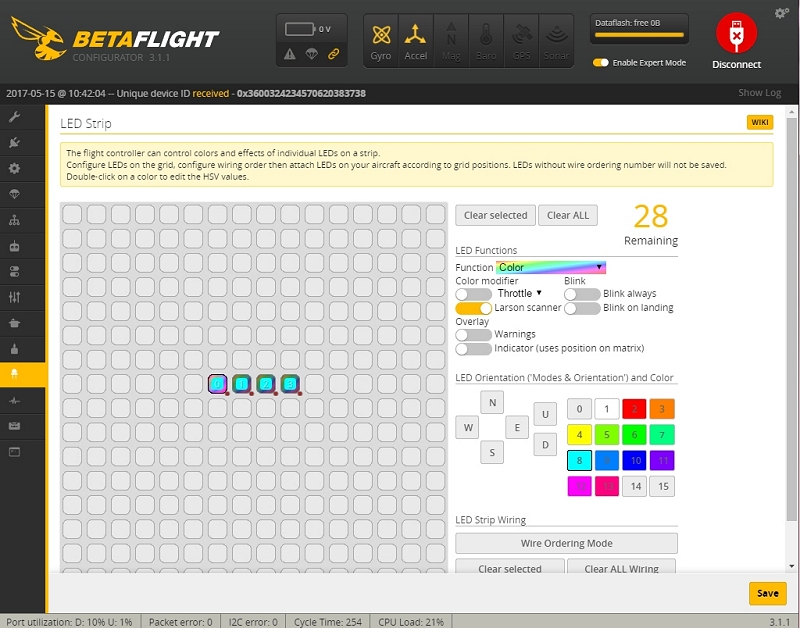
Now click on each LED box (numbered 0 – 3). With each box, click on “Funtion” on the right side of the interface, chose “Color” there and then your desired color. Repeat this with each LED box.
Now click the SAVE button. To test your work, connect a Lipo battery to the KingKong. The LED strip should now light up.
You can even enable or disable the LED strip using a switch on your TX! Go to the “Modes” page in BetaFlight and activate the “LEDLOW” mode and select an AUX channel on your TX.
This is how it looks like:
| Useful Links |
|---|
| KingKong 90GT at Banggood |
| KingKong 90GT Spare Props |
| Racerstar 1935 5-Blade Props |
| LED Strip |
| 2S 850mAh Akkus at Hobbyking |
| 1000TVL Micro FPV Camera |
Articles in this category
Recent Comments
Leave a Reply
You must be logged in to post a comment.








 SHIRTS & HOODIES



Very good writeup on the 90gt. Any more tips.on tuning will be appreciated.
This is great, very nice writeup – don't suppose you've added OSD to your 90GT? I'd love to see a similar writeup for that with wiring diagrams etc.
I did not add an OSD yet since I don't see any reason to do so. The only useful information would be the battery voltage, but I set up a timer on my TX that alerts me in time. If there are other advantages of adding an OSD, let me know and I'll probably give it a try
Hi Mike, how did you *hide* the dsm receiver in this KingKong without using your designed lipo tray?
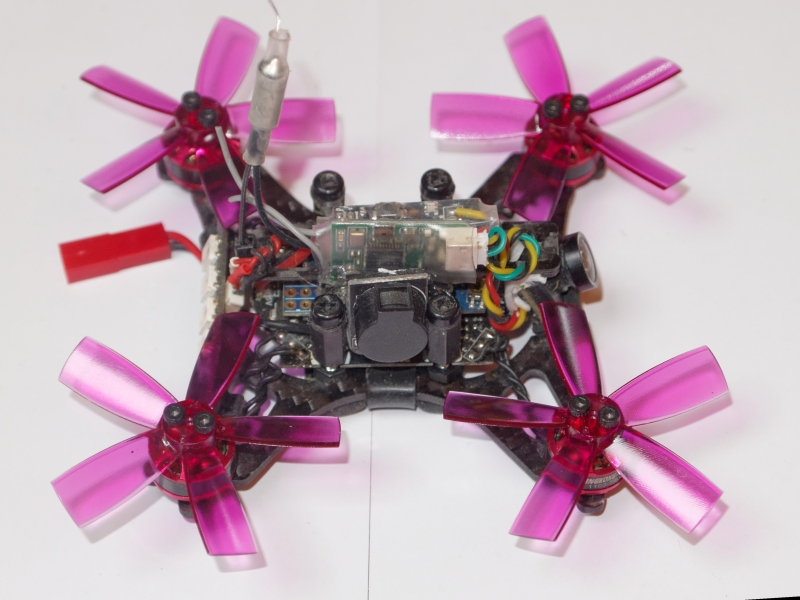
Bob, I added three more pictures to the slide show above that show how I added the receiver. See the last three images. Watch the green / yellow / black cable, they go to the receiver. I placed it on top using some hot glue. You have to tilt the receiver 90 degrees the side and place it between the buzzer and the video transmitter.
Is there a way to adjust the low voltage cutoff my drone drops out when I give full throttle at around 3 half min than it'll fly unless I punch it. 450mah 50c
If the quad powers off or reboots, it may be caused either by a weak (old) Lipo or a weak LDO. The LDO is the part on the flight controller board that supplies constant 5V power. If the LDO can't deliver enough regulated 5V power for the receiver, cam, VTX etc., the board will shut down or reboot. The lag of power supply could be solved by adding a 5V BEC (like this one: http://bit.ly/2Dh7I1Z). Its power output is much more stable than the built in power converter (also provides more ampere). The BEC's input is connected directly to the Lipo pads, the output can be used to feed receiver, LEDs, cam, VTX etc.
Please help, I follow your the buzzer instruction that is good but when Arming and flying the buzzer work during flying and stop when disarming.
@Nguyen: probably a too sensitive low voltage setting in Betaflight? Also install the latest Betaflight GUI, it has a section to configure the buzzer in detail (beep conditions). Also check your RC channels in Betaflight to ensure that the arm switch does not activate the buzzer.
should I connect to +b or -b ?
one set of instructions showed -b, but you seem to show +b