
EMAX BABYHAWK-R
Inhalt:
Page 1: Review
Page 2: Betaflight Setup
Page 3: Adding LED Strip
Adding a LED strip to the Babyhawk-R
The Babyhawk-R comes without LED strip. But it’s not that hard to add one. Ideally the Aurora 90 LED Strip with four programmable RGB LEDs.
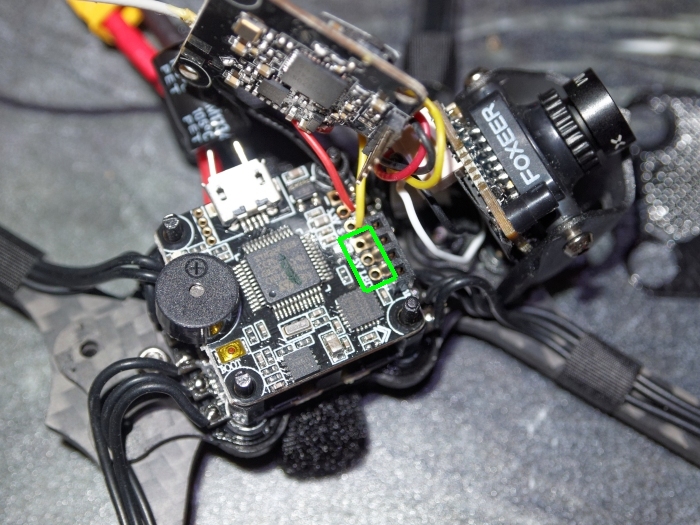
As usual there are three pins (5V, GND and signal) for mounting LEDs on the flight controller board of the Babyhawk. To get to these pins, we first take off the video transmitter that is plugged onto the flight controller. Right next to the yellow cable we see the three LED pins:
However, the plastic connector into which the video transmitter is plugged gets in our way when we are soldering:
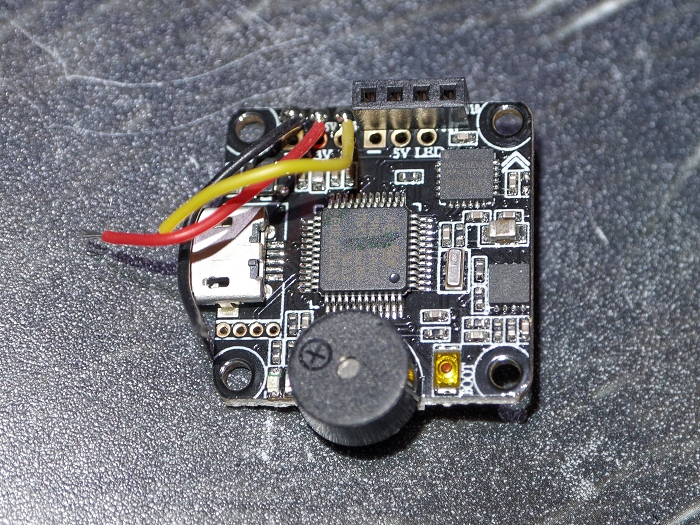
So we also take off the flight controller board to get to its underside – where the LED pins are easier to reach. There we attach three cables (GND, 5V and signal):

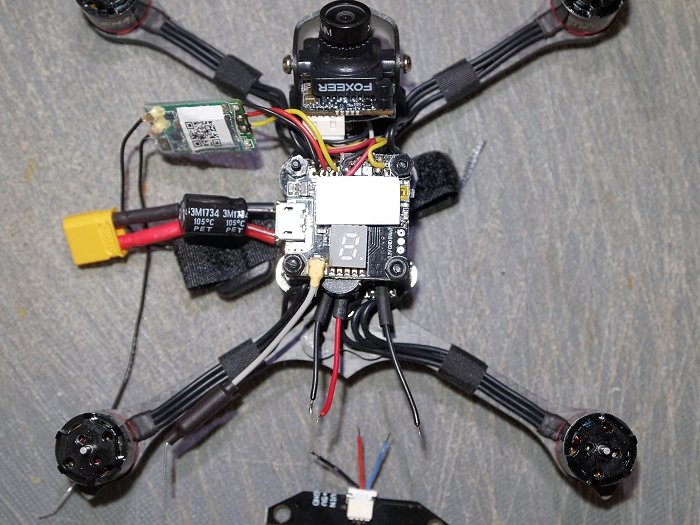
Now we can put the flight controller and the video transmitter back on. The LED cables, which we attached, can be put between flight controller and ESC board, right to the back of the quad. So everything is neatly stowed away and the cables are safe there:
Now we only need to solder the three cables of the LED Strip to our three laid cables and are almost done:
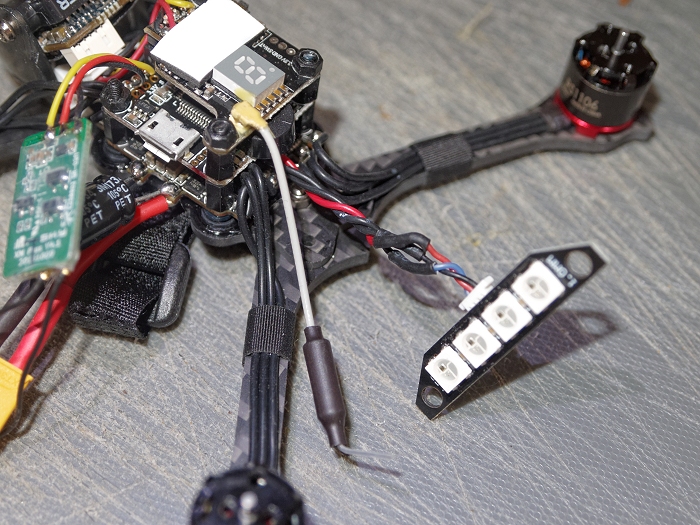
Now we have to attach the LED Strip somehow to the two rear arms. I designed a LED holder for the Babyhawk-R, which you can print with the 3D printer. You can download it for free here on Thingiverse. The LED holder is simply attached to the two rear screws that also secure the Babyhawk-R cover. We glue the LED Strip itself to the LED holder with two blobs of hot glue, that’s it:


You think this article raised lots of questions? Or you're interested into this topic and would like to know more about? Want to express your personal oppinion? Then feel free to drop a comment here.
View all articlesArticles in this category
Recent Comments
Leave a Reply
You must be logged in to post a comment.


 Author: Mike vom Mars
 SHIRTS & HOODIES


Hello,
I have the babyhawk R 112m by emax and i am confused as i dont know which FPV app i need to view the live videos fron hawk as it travels or do i not need sn app.
Hi, I think you should buy FPV goggles, because all "real" FPV are using analog transmission over 5.8 GHz (babyhawk does). So if you would like to use your tablet or phone (bad idea because of video latency) you should check banggood and look for "USB fpv" device. But it's way better to fly with goggles – even cheap one.
Right. Most racing drones use ANALOG video transmission on the 5.8GHz band. There are dozens of 5.8GHz video goggles available (Fatshark, Eachine, Aomway etc). Camera drones, in contrast, are mostly using DIGITAL video transmission which requires a smartphone app. DIGITAL video transmission is not useful for racing drones because of the noticeable lag (150 milliseconds or more). This is why racing drones all use ANALOG video transmission (no apps – just an analog FPV goggle required).
Vielen Dank für das tolle Review. Aufgrund dieses Tests habe ich mich auch für diesen kleinen Racer entschieden.
Und ich bin begeistert!
Leider hat aber der LED-Mod nicht so richtig funktioniert bei mir. Also eigentlich hat alles funktioniert, aber das Videobild hat ganz verrückt geflackert sobald ich die LED eingeschaltet habe. Ich habe das selbe LED-Board wie hier benutzt. Hattest du das gleiche Problem?
Es könnte sein, daß das Flight Controller Board des Racers nicht mehr genug Strom für den Videosender bereitstellen kann, sobald die LEDs als Verbraucher mit angeschlossen sind – dieses Problem haben viele Minis, vor allem wenn der VTX auf die höchste Sendestufe gestellt ist. Die 5V Schiene der Boards liefert meist nur ~1A, was für Empfänger, Videosender, Kamera, Board und LEDs dann doch sehr knapp ist.
Um dieses Problem zu umgehen, installiere ich bei allen Minis grundsätzlich einen 5V BEC (z.B. der von Matek: https://bit.ly/2Rwjyfs ). Der wird einfach an die Lipokontakte des Racers gelötet und liefert dann genug Ampere für alle benötigten Komponenten.
Hi,
toller Blog!
Wie hast du den LED Strip im Betaflight prgrammiert?
Die leuchten bei mir nur gelb, egal was ich einstelle und zuweise.
Gruß
Rallef
Rallef, hast du den Data Pin des LED Strips mit dem LED Data Pin des Flight Controllers verbunden? Dann sollte es eigentlich funktionieren.
hi, hab den fehler, die V4 der Betaflight macht die LEDś nicht mehr
gruß