![Mike vom Mars Blog anniversary edition betaflight blheli_s dshot eachine lizard95 frsky xm+ gemfan 2035 mini fpv racer mods pids review runcam micro swift vtx03](https://mike-vom-mars.com/blog/wp-content/themes/editor/images/page-curl.png)
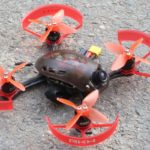
EACHINE LIZARD95 ANNIVERSARY EDITION
Index:
Page 1: Review
Page 2: Betaflight Setup
Page 3: Installing a Runcam Micro
Page 4: Lizard95 Speed Mod
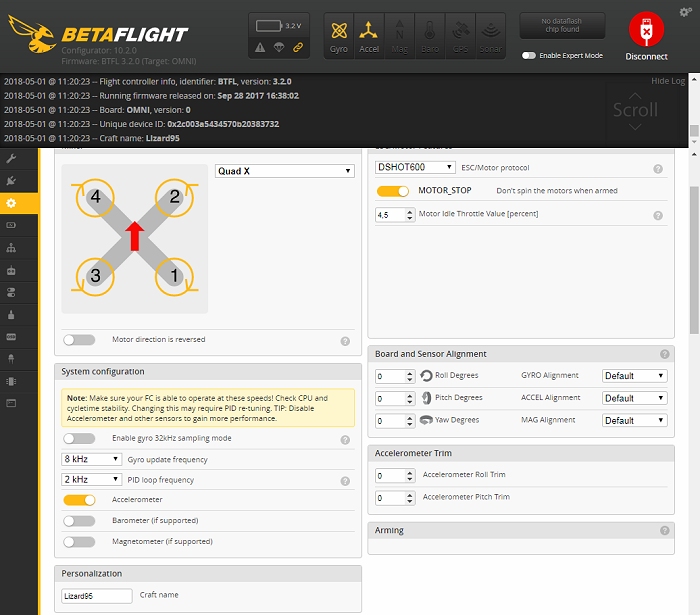
Lizard95 Betaflight Setup
On our Lizard95 Betaflight 3.2.0 is preinstalled and a FrSky SBUS receiver is installed. On the “Ports” page of the Betaflight configurator we activate UART3:
![eachine lizard95 mini micro fpv racer racing review lizard mods modding pids runcam micro vtx03 2S 3S replacement props hints tricks tipps01 anniversary edition betaflight setup led strip mike vom mars blog gemfan 2035](https://mike-vom-mars.com/blog/wp-content/uploads/2018/05/eachine_lizard95_review_lizard_mods_modding_pids_runcam_micro_vtx03_2S_3S_replacement_props_hints_tricks_tipps10.jpg)
The ESC are set to DSHOT600 by default. If you want, you can activate MOTOR_STOP to prevent the motors from starting up immediately when the quad is arming. Gyro and PID frequency are set to 8 / 2. Accelerometer should be activated when you want to fly in Angle or Horizon mode:
![eachine lizard95 mini micro fpv racer racing review lizard mods modding pids runcam micro vtx03 2S 3S replacement props hints tricks tipps01 anniversary edition betaflight setup led strip mike vom mars blog gemfan 2035](https://mike-vom-mars.com/blog/wp-content/uploads/2018/05/eachine_lizard95_review_lizard_mods_modding_pids_runcam_micro_vtx03_2S_3S_replacement_props_hints_tricks_tipps11.jpg)
Our Lizard95 comes with an FrSky SBUS receiver, so we activate “Serial based Receiver” and SBUS:
![eachine lizard95 mini micro fpv racer racing review lizard mods modding pids runcam micro vtx03 2S 3S replacement props hints tricks tipps01 anniversary edition betaflight setup led strip mike vom mars blog gemfan 2035](https://mike-vom-mars.com/blog/wp-content/uploads/2018/05/eachine_lizard95_review_lizard_mods_modding_pids_runcam_micro_vtx03_2S_3S_replacement_props_hints_tricks_tipps12.jpg)
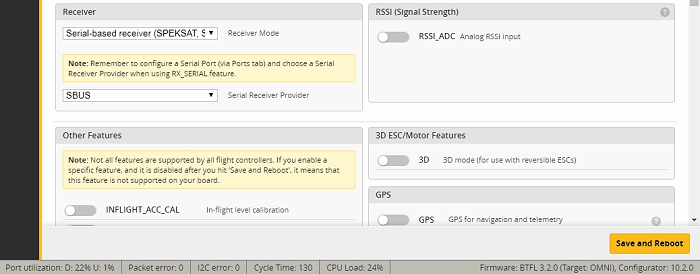
Under “Features”, “OSD”, “LED” and “Dynamic Filter” are enabled:
![eachine lizard95 mini micro fpv racer racing review lizard mods modding pids runcam micro vtx03 2S 3S replacement props hints tricks tipps01 anniversary edition betaflight setup led strip mike vom mars blog gemfan 2035](https://mike-vom-mars.com/blog/wp-content/uploads/2018/05/eachine_lizard95_review_lizard_mods_modding_pids_runcam_micro_vtx03_2S_3S_replacement_props_hints_tricks_tipps13.jpg)
The beeper configuration is as follows:
![eachine lizard95 mini micro fpv racer racing review lizard mods modding pids runcam micro vtx03 2S 3S replacement props hints tricks tipps01 anniversary edition betaflight setup led strip mike vom mars blog gemfan 2035](https://mike-vom-mars.com/blog/wp-content/uploads/2018/05/eachine_lizard95_review_lizard_mods_modding_pids_runcam_micro_vtx03_2S_3S_replacement_props_hints_tricks_tipps14.jpg)
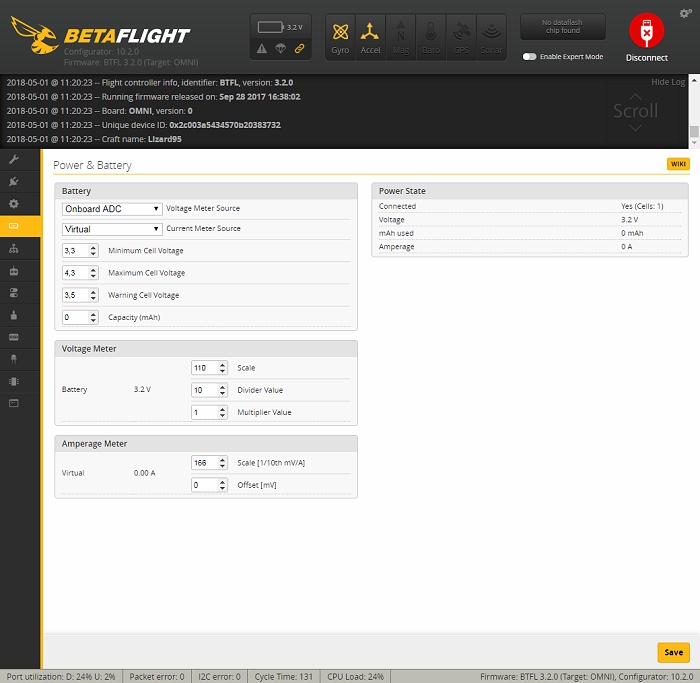
The voltage settings of the Lizard95. We want to see the already flown milliamperes on the OSD in flight. We therefore set the “Current Meter Source” to “Virtual” and enter a scale value of “166” for “Amperage Meter”, which is a decent value if you fly with 3S Lipos. If the display of the mAh consumed in flight does not exactly match the one that you charge back into the battery after the flight, you must increase or decrease this value slightly:
![eachine lizard95 mini micro fpv racer racing review lizard mods modding pids runcam micro vtx03 2S 3S replacement props hints tricks tipps01 anniversary edition betaflight setup led strip mike vom mars blog gemfan 2035](https://mike-vom-mars.com/blog/wp-content/uploads/2018/05/eachine_lizard95_review_lizard_mods_modding_pids_runcam_micro_vtx03_2S_3S_replacement_props_hints_tricks_tipps15.jpg)
The preset PIDs of the Lizard95 are perfectly suited for flying with a 3S Lipo. You don’t have to change anything here. The rates (stick sensitivity) can be adjusted at will. With the advice shown here the Lizard flies nicely fast and agile. The settings of the dynamic filter are also preset and can be left as they are.
![eachine lizard95 mini micro fpv racer racing review lizard mods modding pids runcam micro vtx03 2S 3S replacement props hints tricks tipps01 anniversary edition betaflight setup led strip mike vom mars blog gemfan 2035](https://mike-vom-mars.com/blog/wp-content/uploads/2018/05/eachine_lizard95_review_lizard_mods_modding_pids_runcam_micro_vtx03_2S_3S_replacement_props_hints_tricks_tipps16.jpg)
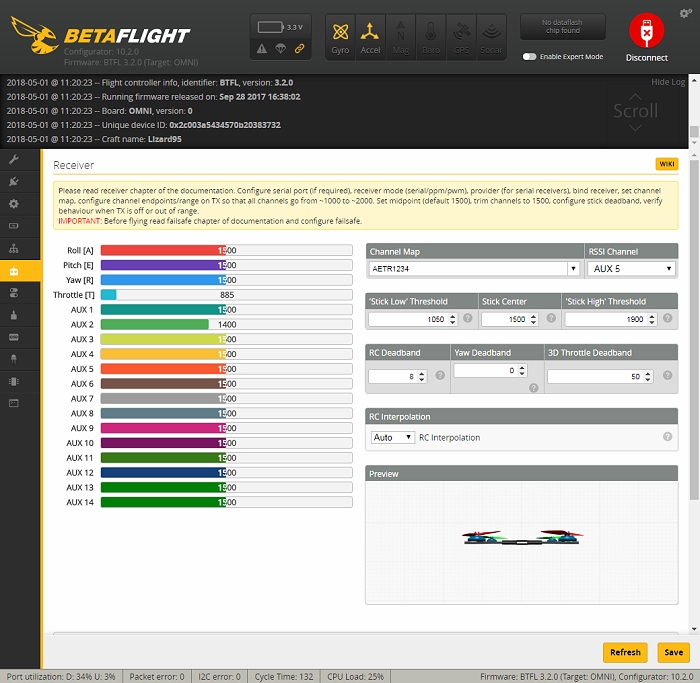
Make sure that the “Channel Map” in Betaflight matches the order of the channels on your radio transmitter. In our case it’s “AETR1234”. Otherwise the channels may not match. The FrSky Receiver of the Lizard95 supports RSSI (display of the current reception strength of the remote control in the OSD). That’s very convenient. The RSSI signal will be transmitted to AUX5, which is also indicated on the receiver page:
![eachine lizard95 mini micro fpv racer racing review lizard mods modding pids runcam micro vtx03 2S 3S replacement props hints tricks tipps01 anniversary edition betaflight setup led strip mike vom mars blog gemfan 2035](https://mike-vom-mars.com/blog/wp-content/uploads/2018/05/eachine_lizard95_review_lizard_mods_modding_pids_runcam_micro_vtx03_2S_3S_replacement_props_hints_tricks_tipps17.jpg)
On the next page: Installing a Runcam Micro Swift
View all articlesArticles in this category